

Lesson Plan - Creating a Student-Produced Weather Forecast
Here are the recommended main steps of the class (but these can be adjusted based on your overall class goals):
Step 1: Decide what kind of forecast you would like to produce.
There are a variety of types of weather forecasts that you could produce with your students. You can create a 5 day weather forecast, 7 day weather forecast, current day's forecast as well as use graphics for map projections and almanac type information.
Include your students in the decision of what type of production you would like to create. Then, determine the elements of your weather forecast production to get an idea of the graphics and information elements you will need for your production. Here is a list of typical elements of a typical weather forecast:
1 Student Meteorologist (who will deliver the weather forecast)
5 Day Weather forecast
7 Day weather forecast
Today's weather
Weather Almanac
Local Map Weather Projections
Step 2: Gather students and assign roles
This varies depending on your production, but here are the typical roles you can assign to students (these roles can be doubled up depending on the number of students in the class):
Meteorologist: Delivers the weather forecast on (and off) camera. May stand on a green screen or chroma key background to deliver the forecast if you have one.
Researcher: Researches the upcoming weather events and data and compiles information for the weather forecast.
Script Writer: Takes weather information from researcher and composes a script that the meteorologist will read on the air.
Camera Operator: Operates the camera during the production
Motion Graphics Designer: Compiles the information from the researcher and script writer and creates weather forecast graphics with the data provided
Tele-prompter Operator (optional): Operates the teleprompter which displays the script for the meteorologist to read on the air.
Floor Director: This can be a student or the teacher. This person is in charge of the production and directs the broadcast.
Step 3: Producing the graphics
There are multiple ways to create weather graphics for your production. If you have the ability, time & talent, you can build your graphics from scratch in Adobe Photoshop or a motion editing program such as Adobe After Effects. A good way to save time and energy is to start from an existing graphics template and customize as needed.
In this example, we will be using an existing weather forecast template:
Weather Template Video: https://vimeo.com/47652776
This template is available for purchase in quicktime format and Adobe After Effects format. The After Effects template is recommended, since it is the most customizable, however, if your class does not have After Effects, the Quicktime versions can be used with most video editors on the market.
Step 4: Adding the weather data
Next, I will walk you through how to add weather data to your graphics and customization of the weather graphic template. For this example, I will show how to create a 7 day forecast and customize it with data that has been gathered.
In Adobe After Effects
1. Open Adobe After Effects and open the weather forecast After Effects Template
2. Open the composition ""RENDER_7 DAY FORECAST"

Within this composition, you will see a number of layers that make up the animation. The second layer in this composition is "EDIT_Weather". Double click this layer composition (or double click it in the Project window).
3. This will open the "EDIT_Weather" composition which is where you will arrange the various weather icons and enter the temperature data.

4. In this composition, you will see the first 7 layers are the various animated weather icons: thunderstorms, overcast, clouds, partly sunny, snowy, rain & sunny. You can shift the weather icons and move them to various days by selecting them on the timeline and using the arrow keys. Also, if you need more than one of an icon (let's say you have 2 days of sunny forecast), you can duplicate an icon by selecting it on the timeline and pressing ctrl+d or by selecting the icon and going to EDIT-Duplicate on your top menu.
Re-arrange the icons on the 7 day forecast and duplicate icons as needed. Icons which are not needed can be hidden by clicking the eyeball icon next to the layer:

5. Next, let’s change the temperature data for each day. Layers 8 - 14 are titled "EDIT_friday" - "EDIT_Saturday". These compositions contain the temperature text data. Simply double click the day you would like to edit:

Then, select your text tool (or double click the text layer you would like to change), select the text you would like to change and enter the correct weather data you would like to change. Do this for each day in your forecast.
6. Now, return to the main composition "RENDER_7 DAY FORECAST". If you entered your data correctly, your composition should display your forecast with the correct weather data and icons. To render the composition to a movie, select composition-make movie from your top menu (or ctrl-m). Render the movie in whatever format is needed for your final video editor or live DVR player.
Within this template, you can also edit a 5 day forecast, Almanac & Today's forecast using the same techniques learned from the 7 day forecast. Also, you can add and remove layers from the template to customize the forecast with your own logo, colors and graphics.
In Adobe Premiere (or another video editor such as Final Cut Pro)
1. Open your video editor (in this example, we will be using Adobe Premiere Pro)
2. Import "motion_weather_blank7Day.mov" and "motion_Icons_alpha.mov" into your editor and place "motion_weather_blank7Day.mov" on your timeline.

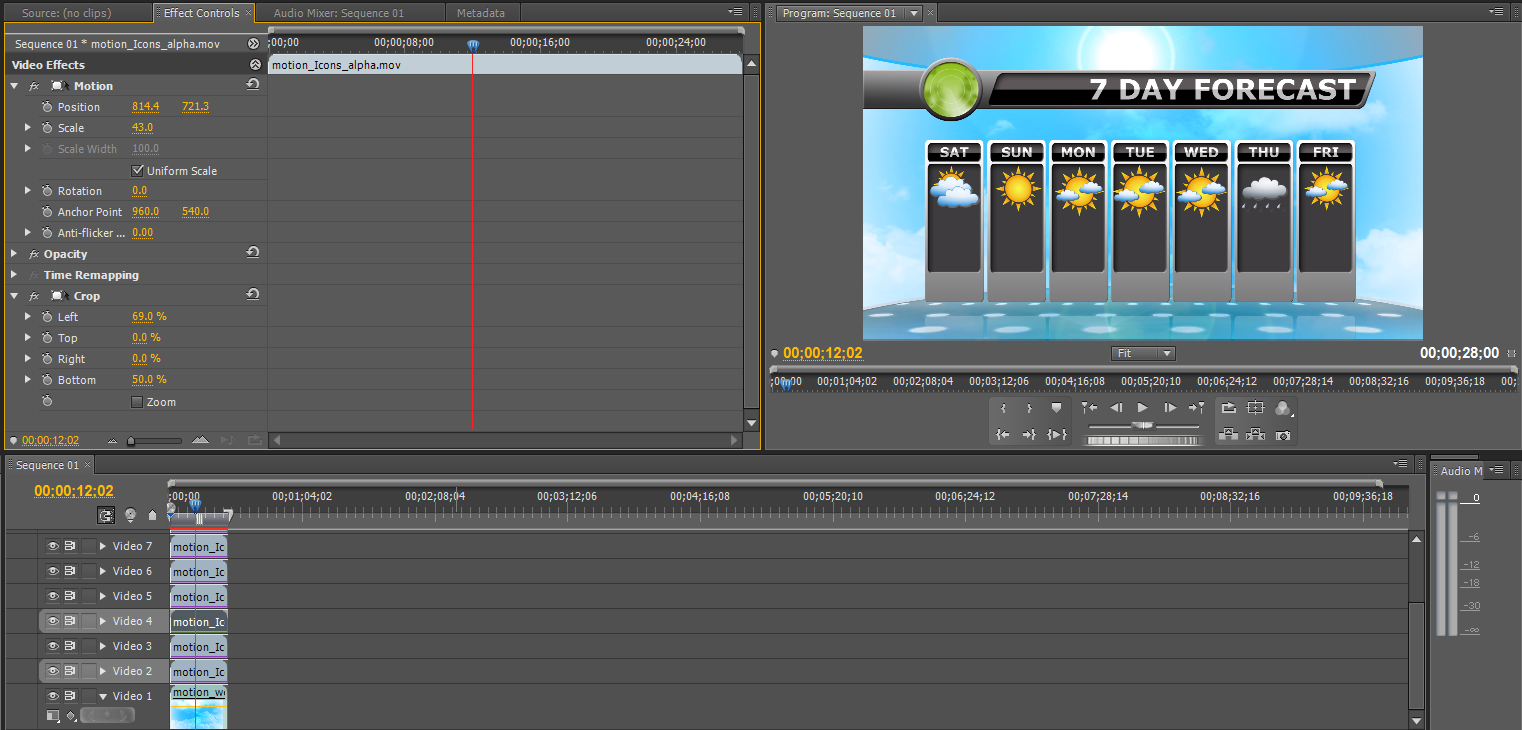
3. Drag "motion_Icons_alpha.mov" onto your timeline. This file contains all of the animated icons in your project. You will need to isolate each icon separately so you can re-arrange and order the icons as your forecast needs. Apply a crop to your weather icons clip to isolate each icon:
Before cropping:

After cropping:

Isolate and crop each animated icon needed in your forecast by duplicating the clip on the timeline and isolating each element with cropping.
4. Once you have all of your icons isolated on the timeline, add them into layers above your "motion_weather_blank7Day.mov" layer:

Scale and position your animated icons and place them into position on the 7 day forecast background.
6. Next, add a text layer to your composition. In premiere, go to FILE-New-Title to create a text layer. Add and style your text content to enter your forecast temperature data:

7. Save this file (you can now use it as a template to create further forecasts without having to recreate the icons or temperature data every time).
8. When you have all of your data and icons in place, export your final movie into whatever format is needed in your production pipeline.
Step 5: Recording the Broadcast
Now, you can record your meteorologist explaining the 7 day weather forecast. This can be done simply with audio as a voiceover, or you can shoot video of your talent on a chroma key background and composite them into the scene:

This can be done in post production or live if you have the necessary hardware and software setup to do live chroma keying. If you have a script and teleprompter, the on air talent can read from the teleprompter.
Step 6: Distribution of the Broadcast
Once you have created your final packaged forecast, you can distribute the video to your broadcast playback device or online (or live if you are creating a live broadcast production). Either way, you will have a professional weather production that can be used in a variety of ways.
Step 7: Review
Creating a professional weather broadcast production is a challenge and can be an excellent learning experience for your students. Hopefully, this will allow them to see the complexity of using broadcast graphics and the importance of working as a team to create a finished product. If you have any questions about the lesson plan or how it could be used within your educational setting, please contact me at robert@digitalassociations.com.
Templates and designs used within this tutorial can be found at: www.virtual-studio-set.com
Meet the Author, Robert Pancake
Robert Pancake is an animator and graphic designer specializing in broadcast production and design.